You can initiate commercial payments on behalf of your merchants using Apple Pay on your frontend. Currently, this flow is for web-based platforms only. If you plan to build a mobile app, please mention it to your account manager.
If you plan to integrate top up by Apple Pay, please refer to this page (set up is different).
Prerequisites (initial setup):
Tip! For faster set up, we strongly recommend scheduling a call with our engineers, together all set up can be done during one call.
- If you don’t have it yet, the first thing would be to create an Apple developer account based on instructions from Apple: Before You Enroll – Apple Developer Program
- Then sign in to Your Apple Developer account
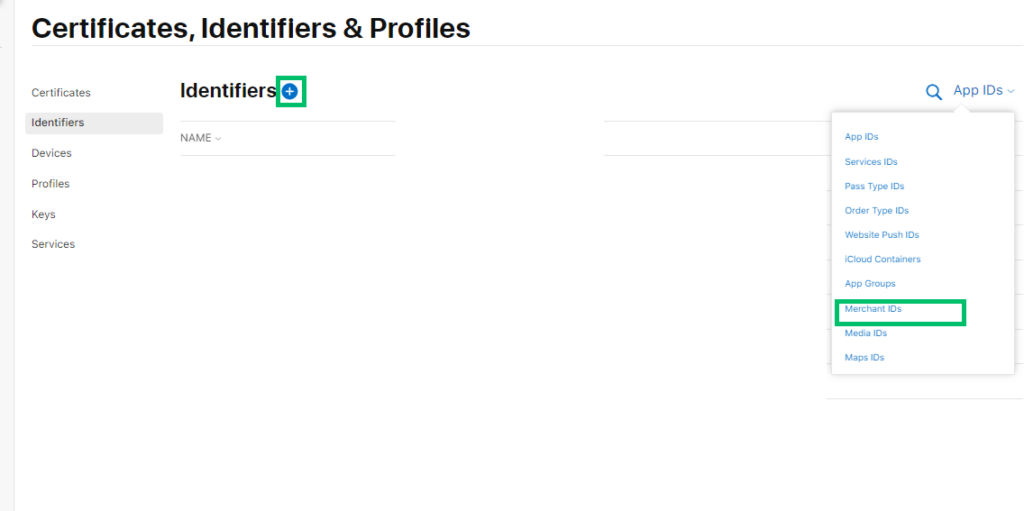
- Create a new merchant identifier by opening the Identifiers section

- Select “+” sign and Merchant IDs under it
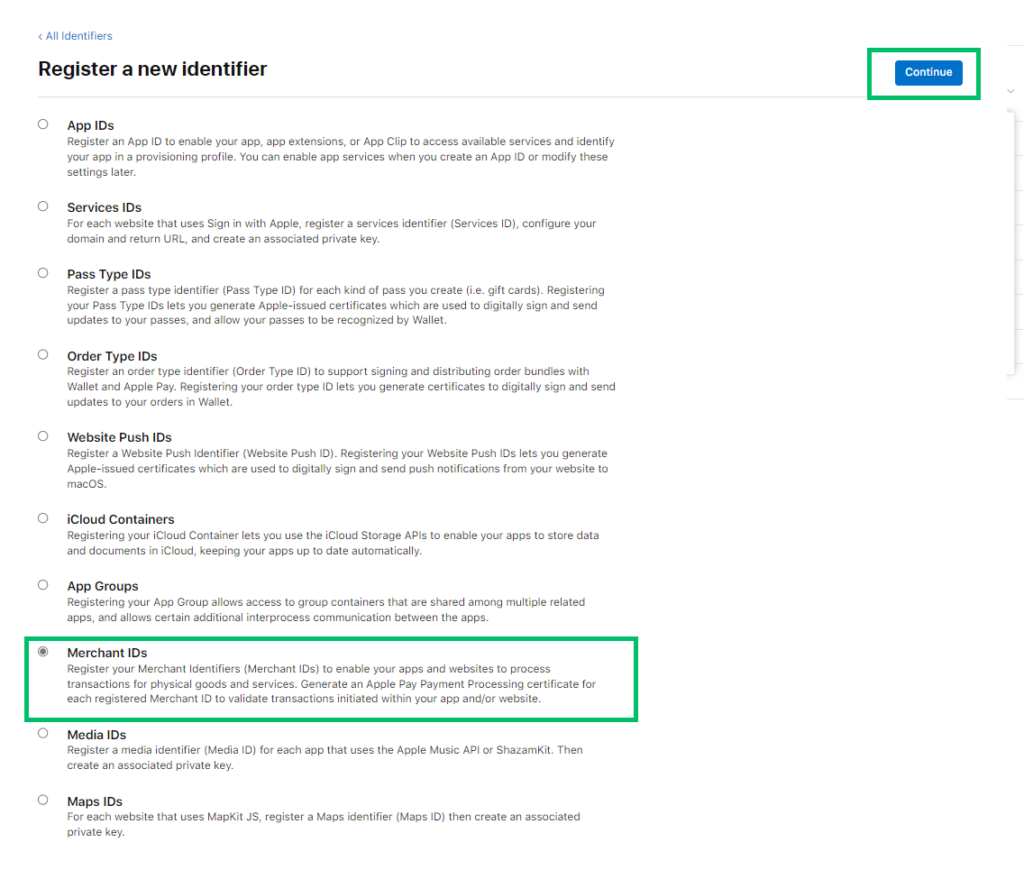
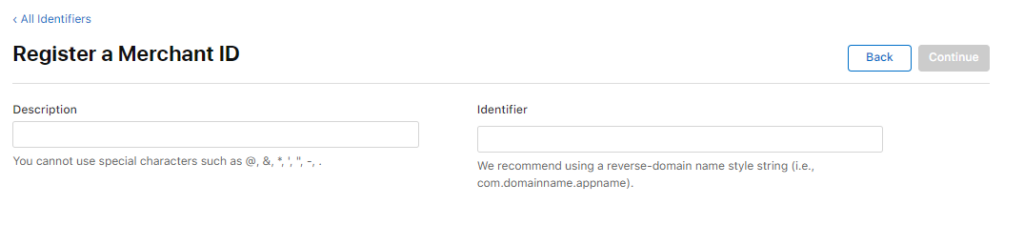
- Fill in the required data and register it
- Write an email to [email protected], including merchant Identifier, brand Id and ask to create a .csr file for Apple pay integration
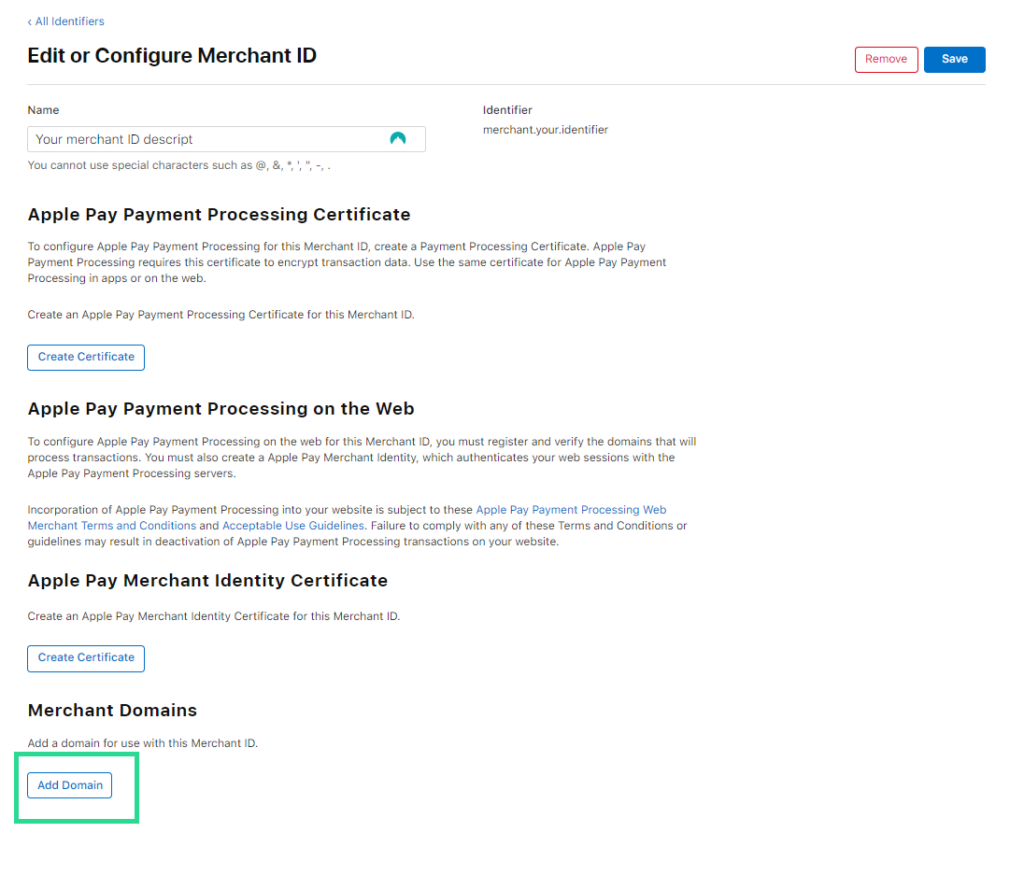
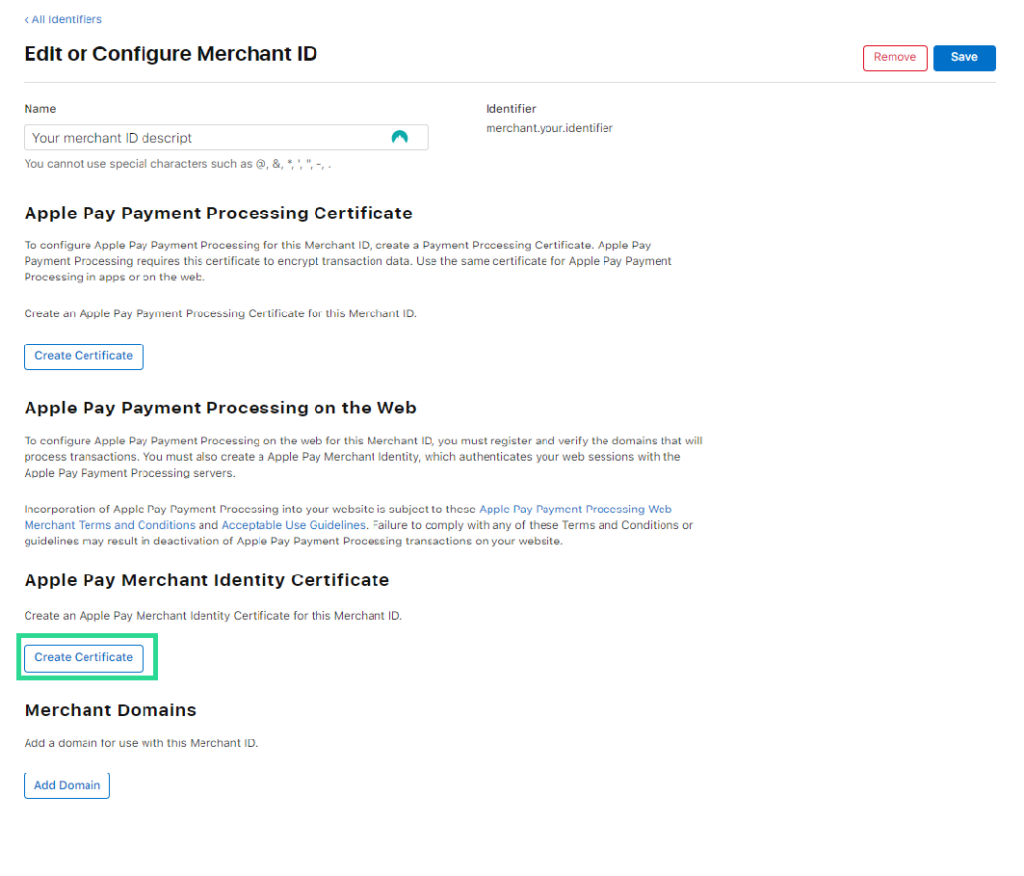
- After receiving the .csr file from us, a payment processing certificate can be created in the Apple Developer account. Open the created merchant identifier and click “Create Certificate”

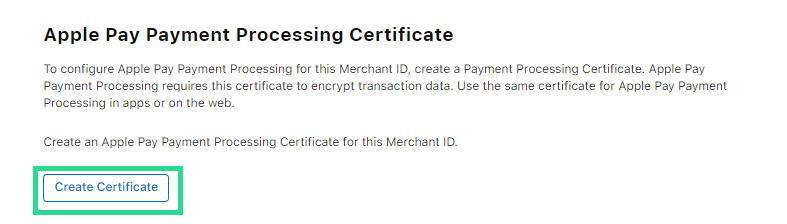
- Then upload the .csr file received from us
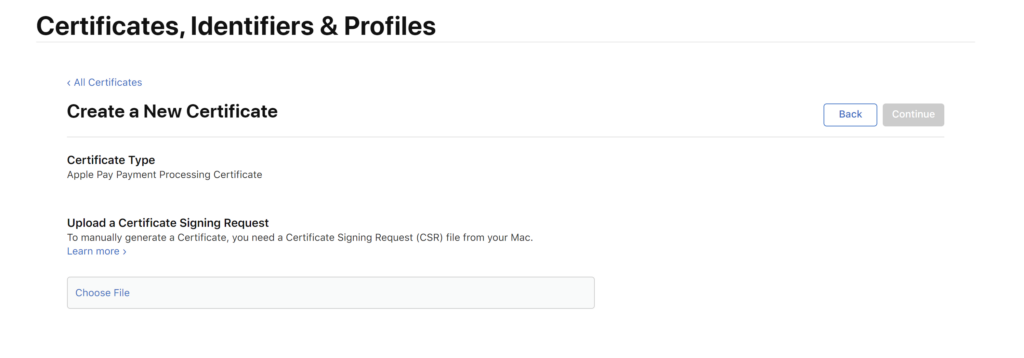
- You will receive a payment processing certificate from Apple. Send the certificate to [email protected] in a zip file. The certificate needs to be sent in a zip file as due to security reasons, we block all certificate files sent to the ConnectPay server. We will send you back the merchant identity .csr file
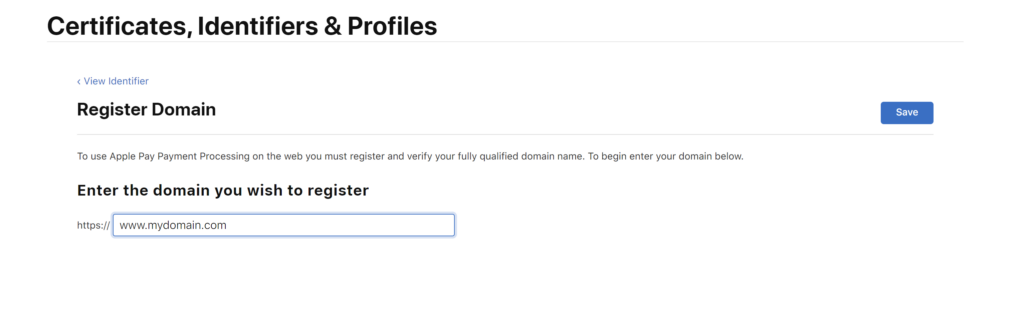
- Then, add your domain to the Apple Developer portal. Open your merchant identifier, click “Add Domain” at the bottom of the page, enter it, and save
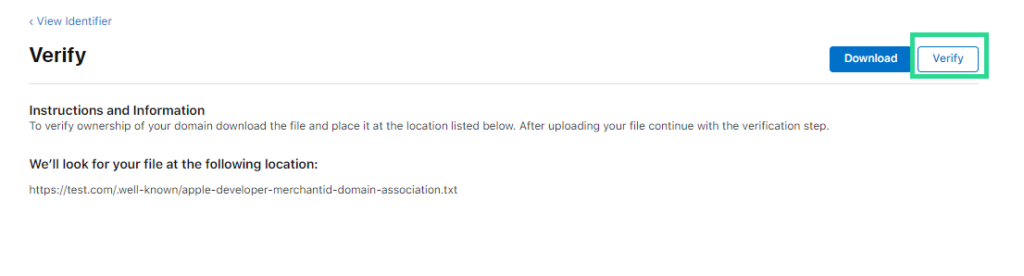
- Download the .txt file from Apple after saving your domain. You must place the domain validation file on your server at: https://yourdomain/.well-known/apple-developer-merchantid-domain-association. Without this file, it will not be possible to use Apple Pay on your domain. Upload this file to the server so it’s accessible at the following location (replacing yourdomain.com with the URL of the domain): https://domain.com/.well-known/apple-developer-merchantid-domain-association.txt . To do this, create a folder called .well-known in the root directory of the website and put the .txt file in that folder
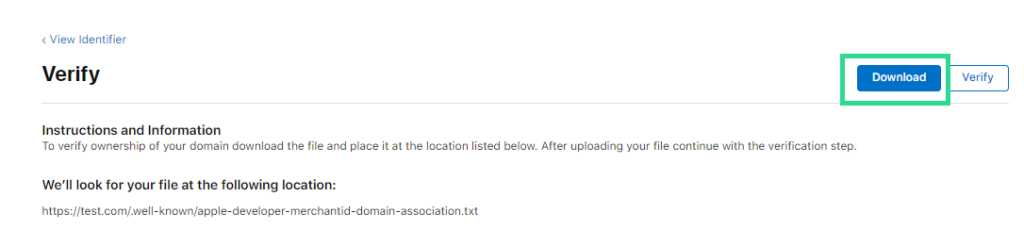
- Once the .txt file has been uploaded, select Verify. Apple will check your domain ownership
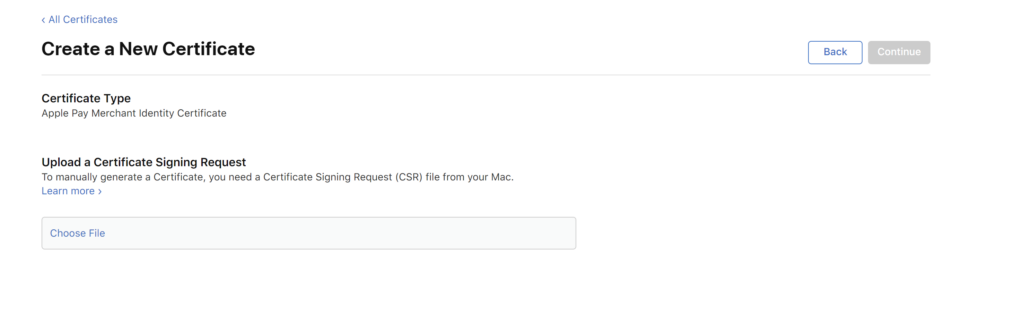
- Then you will need to create merchant identity certificate. Open your merchant identifier in Apple Developer Portal, click “Create certificate” under Apple Pay Merchant Identity Certificate sections (make sure you’re not in the Apple Pay Payment Processing Certificate section). Upload .csr file received from #9 step and press “Continue”
- Download new .crt files and send them to [email protected] in a zip file. The certificate needs to be sent in a zip file as due to security reasons we block all certificate files sent to ConnectPay server
- Please wait for our confirmation that the set up is finished
- Also, you’ll need to white-list Apple IPs and domain names for merchant validation in production and testing. You can find the list here. Do not allow your server to access any other URLs for merchant validation
As a BaaS partner, you can use the same Apple merchant identifier for all sub-merchants.
Apple Pay commercial payments are settled after 3 days of payment initiation.
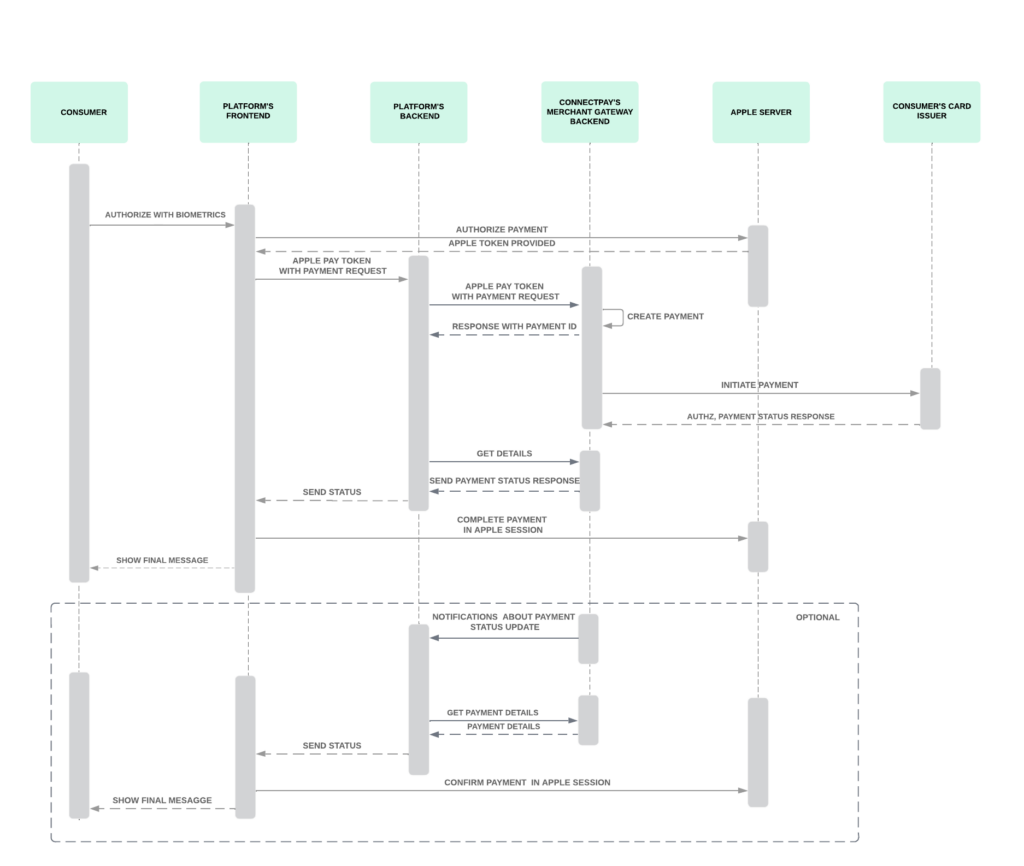
Flow:
Integration can be split into two parts – merchant validation together with session creation and payment initiation.
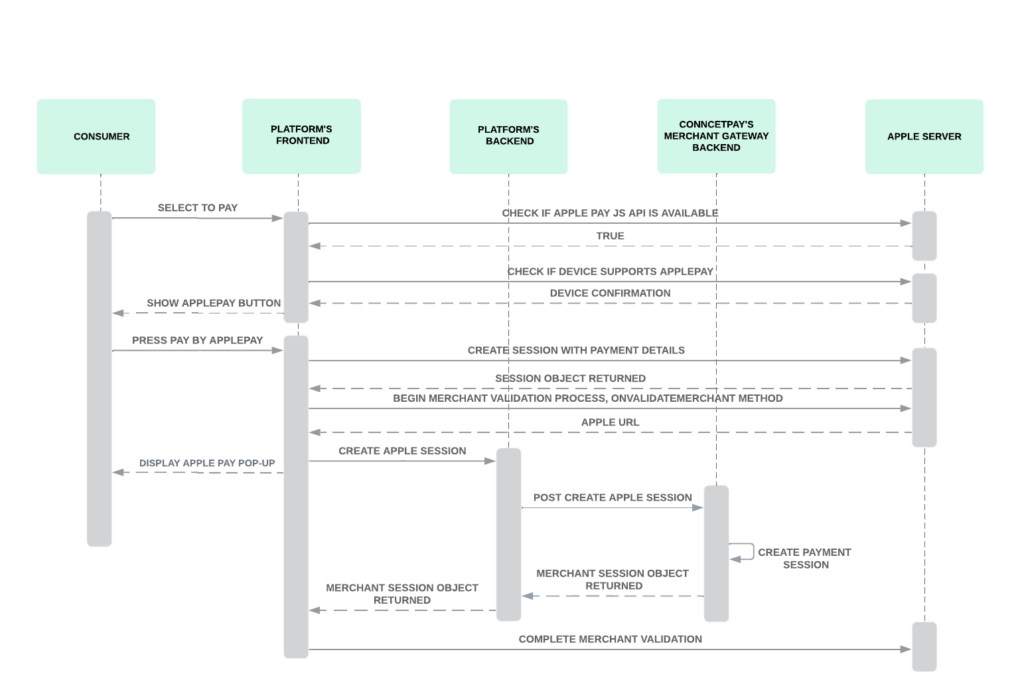
- When your end-user selects to pay by Apple Pay, you need to check if they are using Safari browser by checking if window.ApplePaySession class exist.
- After that, you’ll need to check if the device supports it. This can be done by calling the Apple canMakePayments method. If you receive
truevalue, then the device supports making payments with Apple Pay, and you can show he Apple button on your frontend. It doesn’t verify whether or not the user has any provisioned cards in Wallet. If you want to show the Apple button only for those users who have active cards added to the Wallet, you can use the canMakePaymentsWithActiveCard method. If returned true, then the device supports Apple Pay and there is at least one active card in Wallet that is qualified for payments on the web.
if(window['ApplePaySession'] u0026amp;u0026amp; ApplePaySession.canMakePayments(u0022pass merchant id hereu0022))- You’ll need to style the Apple Pay button based on Apple’s requirements. Styling done against requirements might bring blocking from Apple after some time.
- After you decide to show the Apple Pay button and the user selects Pay, you’ll need to create a session with Apple by initiating an Apple Pay session. For version parameters, follow Apple’s guidelines; for payment request parameters, use:
countryCode– LT;currencyCode– selected currency, for now EUR only;supportedNetworks– visa, MasterCardmerchantCapabilities– supports3DSlabel– your Platform name or what you want to show on the Apple pop-up;amount– amount from the user’s selection.
nvar request = { countryCode: 'LT', currencyCode: 'EUR', supportedNetworks: ['visa', 'masterCard'], merchantCapabilities: ['supports3DS'], total: { label: 'Your Merchant Name', amount: '10.00' }, } var session = new ApplePaySession(3, request);n- After the session is created, call its begin method to show the payment sheet. When this method is called, the payment sheet is presented, and the merchant validation process is initiated. Then use
onvalidatemerchantfunction to start the validation process.
const request = {n countryCode: 'LT',n currencyCode: 'EUR',n supportedNetworks: ['visa', 'masterCard'],n merchantCapabilities: ['supports3DS'],n total: { label: 'ConnectPay', amount },n }n const session = new ApplePaySession(3, request);n session.begin();n session.onvalidatemerchant = (event) =u003e {n const { validationURL } = event;n // do the validation here // after receiving the session object from back end call in session.completeMerchantValidation(by passing the object here);n };- After Apple validates the session and provides the session URL, send this URL together with your brand ID from your backend to us using the Create Apple Pay Session API .
- We will complete merchant validation with Apple, create a session, and return the merchant session object to you. Don’t modify this object; you’ll need to use it for payment authorization flow.
- Pass merchant session object received from us to Apple using the completeMerchantValidation method to enable the user to authorize a transaction. The merchant session object expires 5 minutes after it is created.
- When your session is validated and created on the Apple side, the user can now authorize a payment. When the user authorizes a payment, the onpaymentauthorized function is called. The event parameter contains the payment attribute. The
onpaymentauthorizedfunction must complete the payment and respond by callingcompletePaymentbefore the the 30 second timeout, after which a message appears stating that the payment couldn’t be completed.
session.onpaymentauthorized = (event)=u003e {n const token = event.payment.token;n // handling the payment authorization n}- Take Apple token from
onpaymentauthorizedfunction and send it to us using Initiate Apple Pay API. We will create a payment and send it to your customer’s issuer. - For receiving payment status you have 2 options: calling our Get payment details API using
paymentIdprovided in Initiate Apple Pay API response or receiving payment status from Notifications (you need to subscribe to notifications to do that). - After you receive the terminal payment status from us –
FailedorApproved, you need to complete payment on the Apple side using the completePayment method. Until this method is called, Apple will load the spinner on UI, blocking the user from further actions or time out after 30 seconds claiming payment couldn’t be completed. If the payment status isPendingProviderorProcessing, retry calling Get payment details API until you receive terminal status. - After payment is completed on Apple, you can decide what to do with the user journey – show a success/failure message or redirect to the other page.
Tip! Before the payment authorization flow, Apple session time-out is 1 hour (the time frame when the user can select their card); if your session is shorter, you can handle it by calling the abort function on your session time-out event. If you don’t align the Apple session with your session time, your user will be blocked by the Apple pop-up after your session is expired,
Splitting one payment for multiple
sub-merchants
For BaaS partners, it is possible to send 1 Apple Pay payment request on behalf of multiple merchants. This feature is used for marketplaces where end the user can add multiple goods from different merchants through one platform’s website. One payment can have a maximum of 10 different merchants in the payment request. Configuration at Apple side remains same as you’ve created, website where end-user is making a payment should be registered at Apple. When sending the Initiate Apple Pay API request, add an optional object splittingInstructions with brand IDs representing merchants the user is paying for. You can add your own commission fee for each merchant.