You can find our extension here:
Installation guide
PrestaShop requirements:
- PHP 7.1 or higher
- Prestashop 1.6.1.20 or higher
- A ConnectPay Online Banking account
- An SSL certificate for your web store
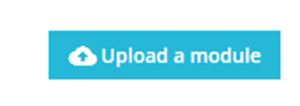
To install the ConnectPay plugin, you’ll need to log in to your BackOffice, navigate to Modules -> Modules manager menu page, click on upload a module (Image 1.1.), a dialog box will appear.
Drag & drop the connectpay.zip file into the Upload a module dialog. You will receive Module Installed! Success message (Image 1.2.):
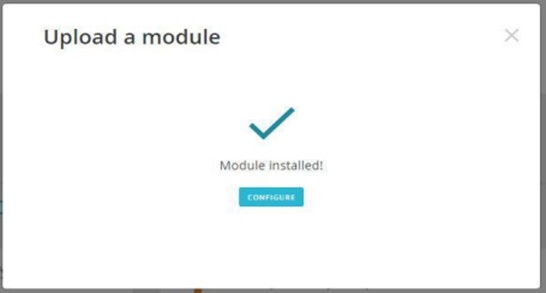
Image 1.2
Another way of installation is to use FTP Way. Download the connectpay.zip file to your computer, then extract it and upload the ConnectPay folder into the PrestaShop modules directory. After that, log in to your BackOffice, navigate to Modules -> Modules catalog menu page, type module name in the search (ConnectPay), hit the Install button to finish installation.
How to find a module in your e-commerce?
After the installation, you will be able to configure straight from the pop-up; however, if you want to come back later, there will be no pop-up.
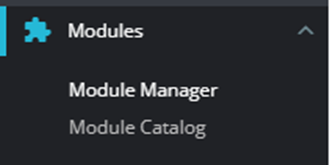
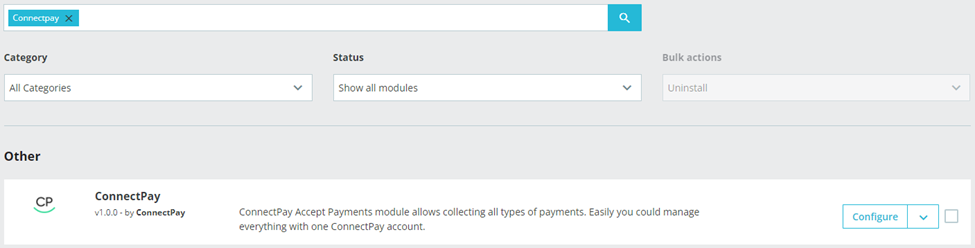
For the main ConnectPay plugin configuration page you need to visit Modules -> Module manager (Image 3.1). -> Type “ConnectPay” in the search field at the top of Module manager page (Image 3.2).
Another place where you can find our module is by selecting Payments -> Payment methods, and there you will see the ConnectPay payment method in the payment methods list (if the ConnectPay plugin is activated) (Image 3.3).
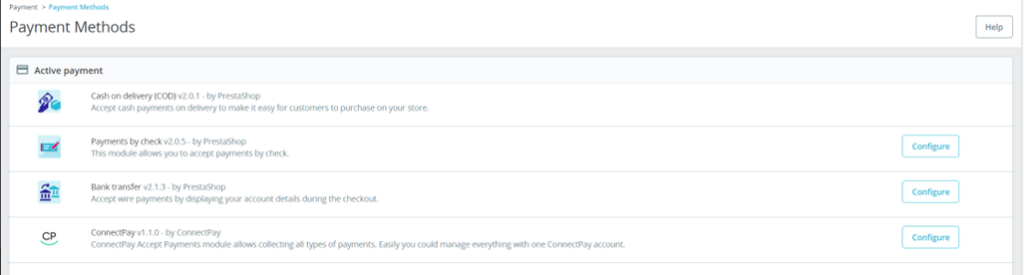
You can enable it on this page or on the plugin’s configuration page. To configure the ConnectPay payment gateway, click the “Configure” button next to it.
How to configure your module?
When you opened our module, please enter your credentials in “Set up“ TAB, and configure basic features (Image 4.1).

- Client ID is provided to you after you sign a contract with us.
- Client secret is provided to you after you sign a contract with us.
- BrandID is provided to you after you sign a contract with us.
- Private key is provided to you after you sign a contract with us, please don’t change the format and upload exactly as you got it from us.
- Payment methods – payment methods for the customers to pay within the E-Shop. CARD – is a payment method by debit/credit card (MasterCard or Visa). If you have a contract only for payment initiation service, before enabling Cards, please contact your account executive for your contract change. Bank transfer – payment initiation service, which allows to pay via payment provider (bank);
- Save failed cart data – parameter for the Prestashop version 1.7 and higher. If you enable this feature, the order becomes Canceled in case of a failed payment, returning goods to stock. Customer can pay again with different order created without loosing cart data.
- IS LIVE? – this selection controls environments. If enabled, then production environment is used, if disabled, then – stage environment is used.
- Cron job set up – this field provides the cronjob which can be set in your PrestaShop to automatically change the order states, when an order is paid, or the status needs to be changed for e.g. if the order is refunded, or the payment was approved by ConnectPay.
After the fields are filled out, be sure to press “Connect” to save your details input.
When trying to save, if some required fields are missing, you will be presented with an error at the top of the page stating which fields are missing, and are needed, for e.g. (Image 4.2):

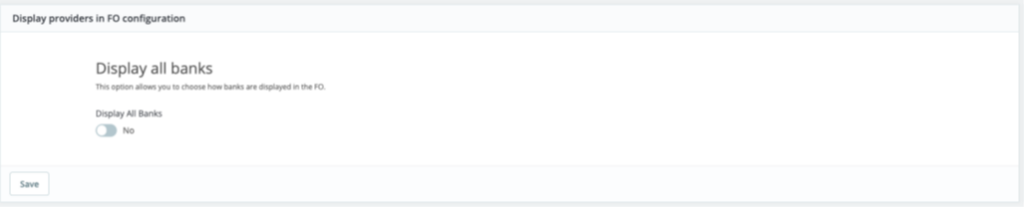
In the payments tab, you can change payment options rendering method (Image 4.3):
Also, you can Load all enabled by ConnectPay providers for a specific country and Enable/Disable them in your store (Image 4.4):
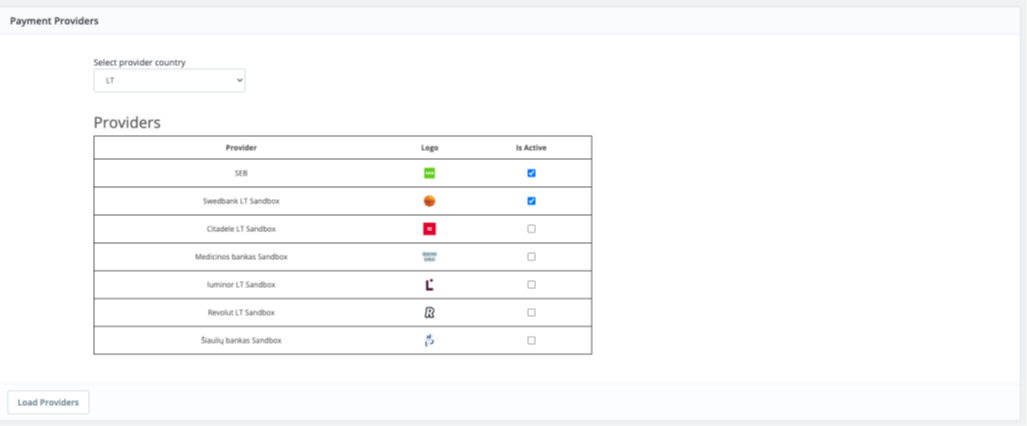
- Select provider country – it can be the main country that is used first, from which providers (banks) are used to accept payments. You can use multiple countries, but one must be selected by default (it represents the first value in our widget / your E-Shop your customers will see). Options list:
- FI – FinlandNL – Netherlands
- LT – Lithuania
- Payment providers – payment providers list (based on a selected country from the Payment countries field) with the function to enable/disable payment providers for the E-Shop. It is an optional configuration. If you don’t choose any, then your customer is redirected to our widget and selects providers there. If you choose some options, then the provider list and logos are represented in your E-Shop and your customer selects providers in your environment. At this moment the selection is not possible for German providers
Notices and requirements:
- At least one payment method should be selected. Select a method that is mentioned in your contract.
- When “DE” is your configured country, instead of payment providers list in the checkout, customer will see payment option – “ConnectPay”, which will allow to freely choose any payment provider.
- When “ConnectPay” is selected, customers will be redirected to ConnectPay’s area and there they will be able to search through German payment providers and pay via their selected bank.
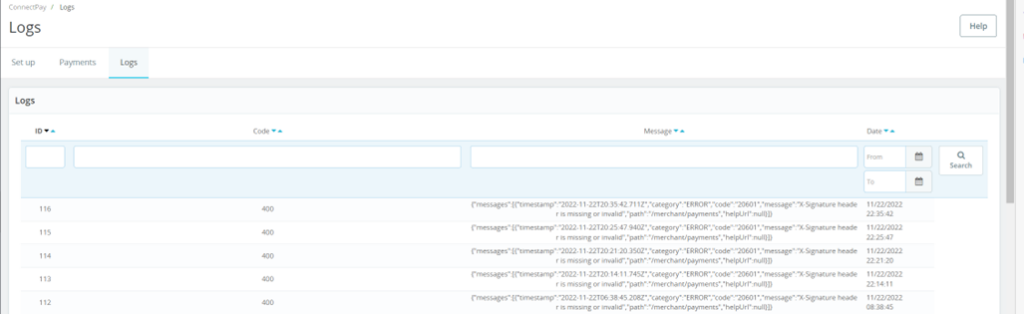
In the logs tab, all the errors that are encountered from the API will be shown: the ID of the error, the error code that represents the issue, the actual error message, and the date when it was registered (Image 4.5):
Order states
ConnectPay controls 3 different order statuses. When the ConnectPay module is installed in your shop, automatically 3 order statuses are also added in your shop, which are displayed in Settings -> Order Settings -> Statuses (Image 5.1):
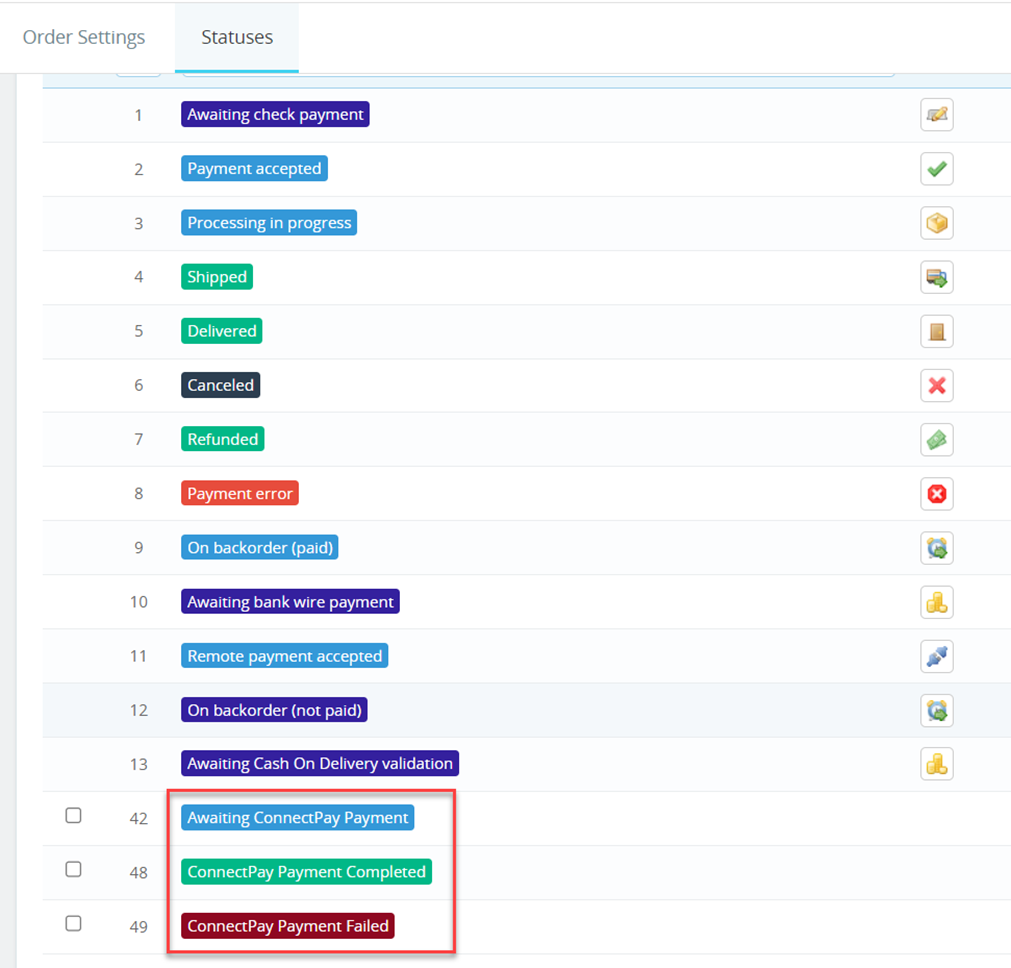
States:
- Awaiting ConnectPay Payment –payment status is not terminal.
- ConnectPay Payment Completed – Payment completed.
- ConnectPay Payment Failed – Payment failed.
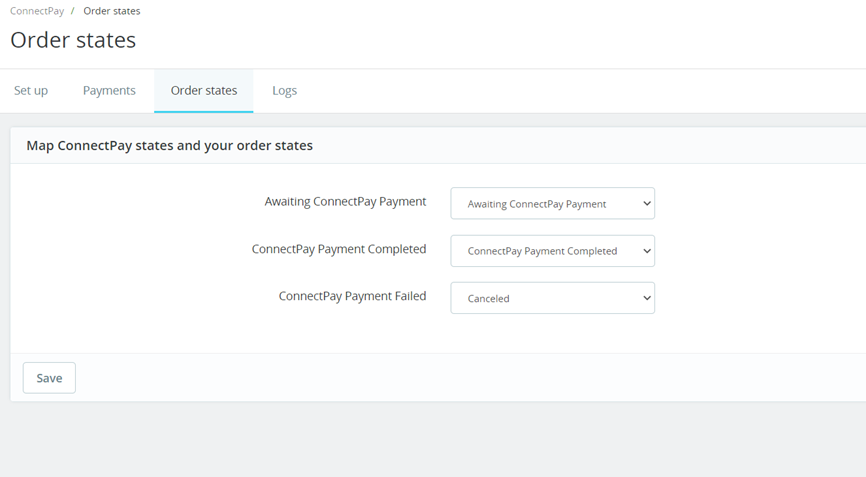
You can map these states to your existing PrestaShop states in the ConnectPay’s module Configuration part -> Order states (Image 5.2)
Cron job set up
The last field is for the cron jobs; this field provides the cronjob, which can be set in your Prestashop to automatically change the order states when an order is paid, or the status needs to be changed, i.e, if the order is refunded, or the payment was approved by ConnectPay. To edit or create your own crontab file, type the following command at the UNIX shell / Linux shell / terminal prompt:
$ crontab -e
You need to add a bolded line , which you can find below “How to set CronJob for Order State Update.” (Image 6.1):

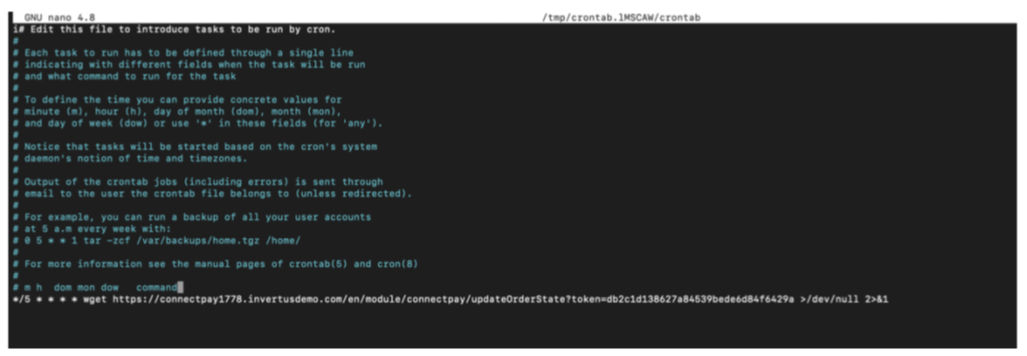
Image 6.1
Save and close the file.
Translations
Module’s back office settings, all the error messages, expressions translations can be edited in International -> Translations.
When you are in the tab, select type of translation – “Installed modules translations”. Select your module – “ConnectPay” Select you language – select the language you want the translations to edit (Image 7.1).
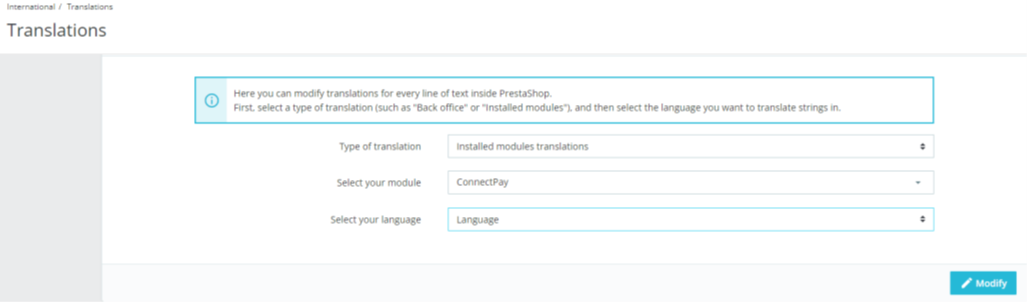
Image 7.1
In there, it’s possible to expand all the fields, and see the translations that can be edited in the module from the back office (Image 7.2).
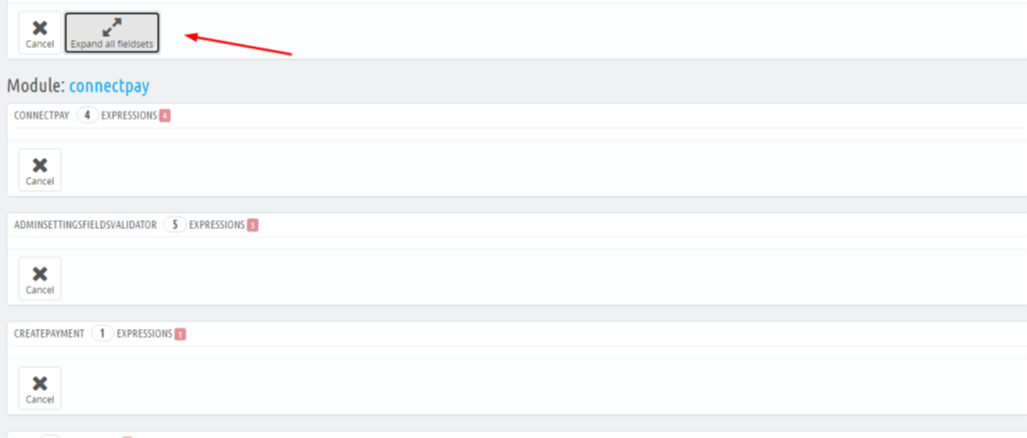
Image 7.2
When you input the translation, be sure to press either “save and stay” or “save” (Image 7.3):
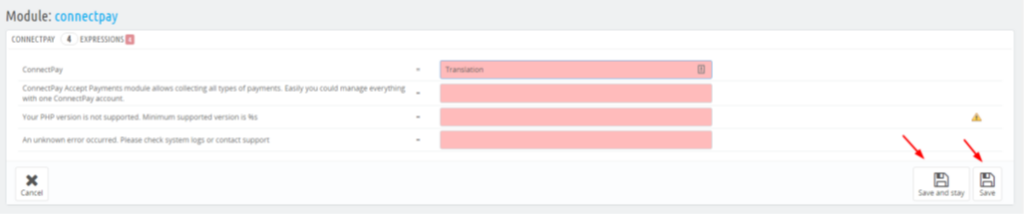
Image 7.3
Payment preferences and restrictions
You can choose to enable/disable ConnectPay for different currencies, customer groups, countries, and carriers. These settings can be found in Payment -> Preferences. These restrictions are only available when the module is installed. Here you can select in which currency customers can pay using ConnectPay, be sure
to hit “save”, when you checkmark the needed currencies (Image 8.1):
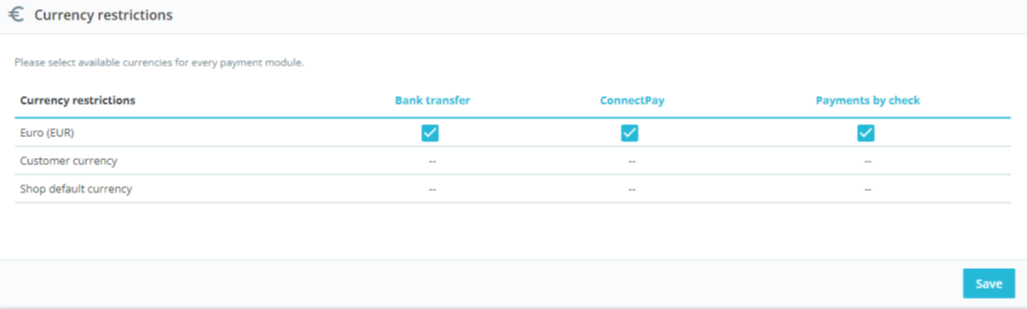
Image 8.1
For bank transfers supported currency is EUR, for card payments – EUR, GBP, SEK, NOK, DKK, PLN, USD. If other currency selected for ConnectPay, then your customer won’t see available payment methods.
In this section, you can choose which customer groups can pay with ConnectPay, be sure to hit “save” when you checkmark the needed customer groups (Image 8.2):
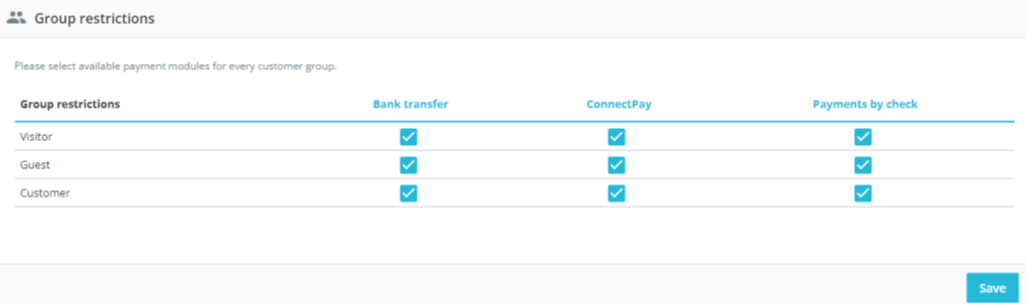
Image 8.2
In this section, you can choose which countries customers can pay using ConnectPay, be sure to hit “save” when you select the wanted countries (Image 8.3):
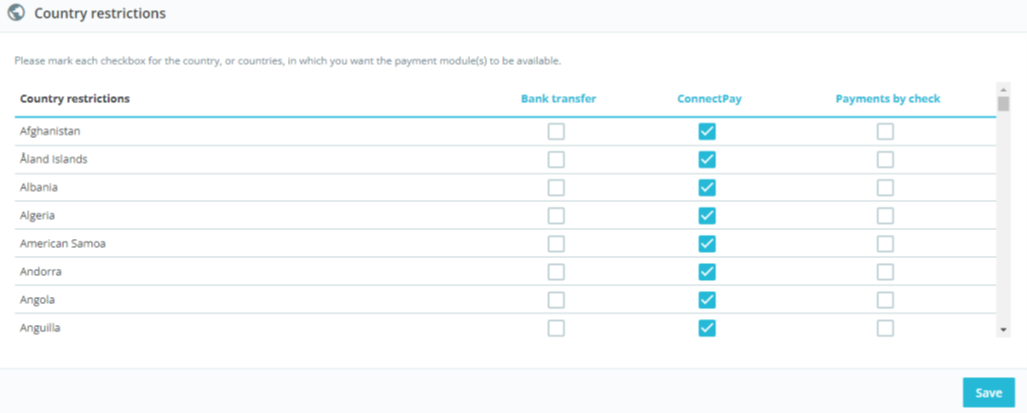
Image 8.3
In this section, you can choose which carriers when selected, can checkout by paying with ConnectPay. Be sure to hit “save” when you select the wanted carriers (Image 8.4):
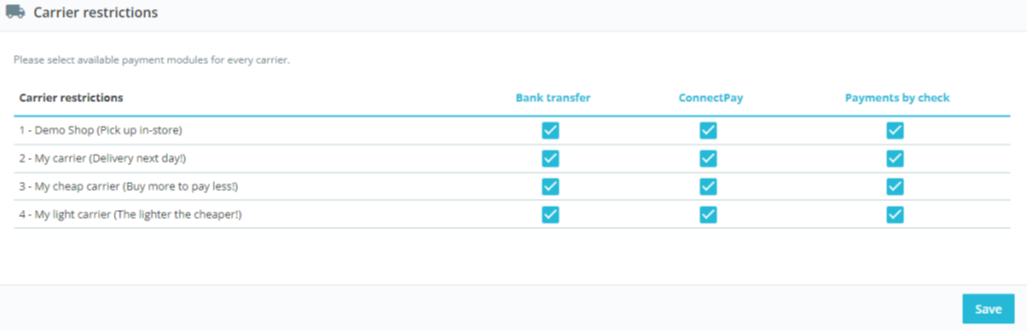
Image 8.4
Important notes
IMPORTANT: PrestaShop’s stock management module for version 1.6 does not recognise ConnectPay’s order states, and for ConnectPay Payment Failed state, you’ll need to make these orders as Canceled so that product goes back to stock. You can do this by going to your order, selecting an existing status and changing it to “Canceled” (Image 9.1), and pressing “Update status”:

Image 9.1
E-Shop side
Description for E-Shop checkout side. The checkout page with the selected ConnectPay payment method will look something like this: when ConnectPay is enabled, the customer can select the payment method (Images 10.1 and 10.2):

Image 10.1
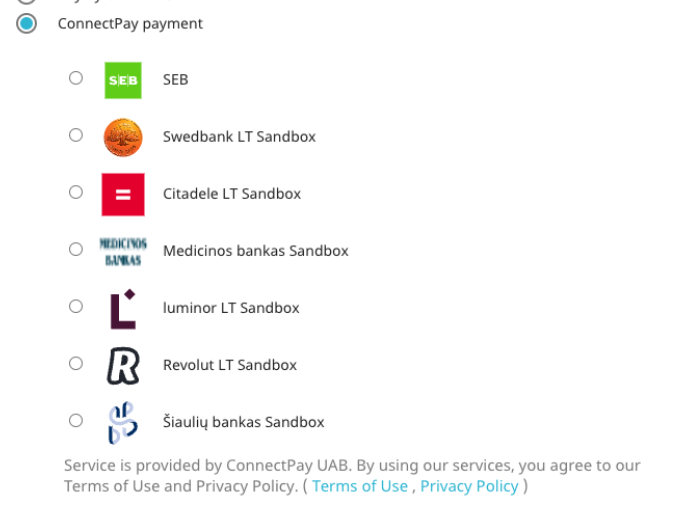
Image 10.2
If the user selects By Bank Transfer, he is prompted to enter his email, and after proceeding, he can select the bank he/she would like to pay with (Image 10.3):
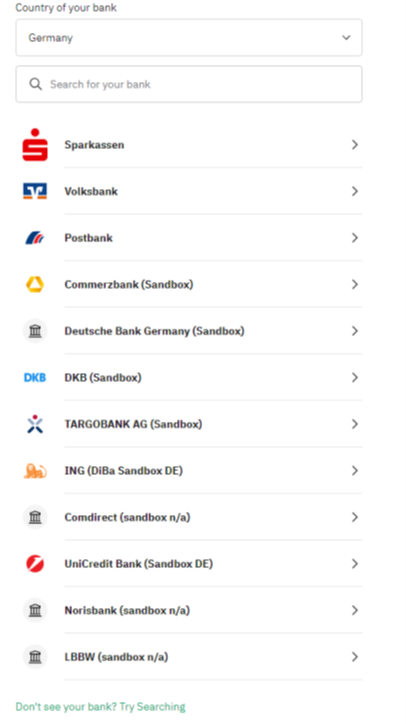
Image 10.3
If a bank is selected on checkout, then this step is skipped.
After payment initiation, the user will be redirected back to the merchant shop (Image 10.4):

Image 10.4
Merchant will be able to see created order in Back Office and see ConnectPay order state. If ConnectPay update order state, then it also will be updated in PrestaShop within 5 minutes. This part is the responsibility of the CronJob, which we configured earlier.
Bank transfer and CARD payment methods selected (Image 10.5)::
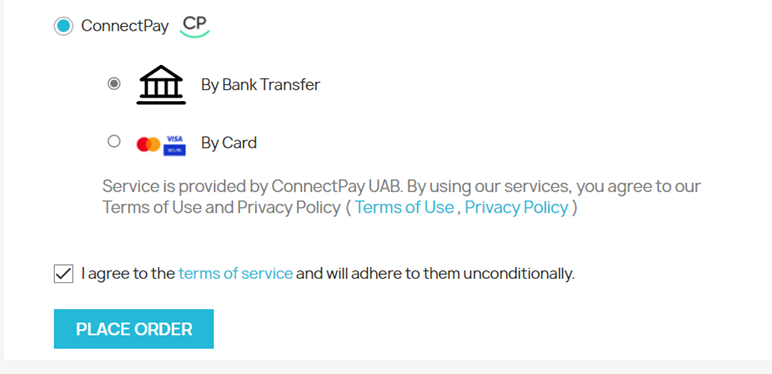
Image 10.5
Only CARD payment method selected (Image 10.6):
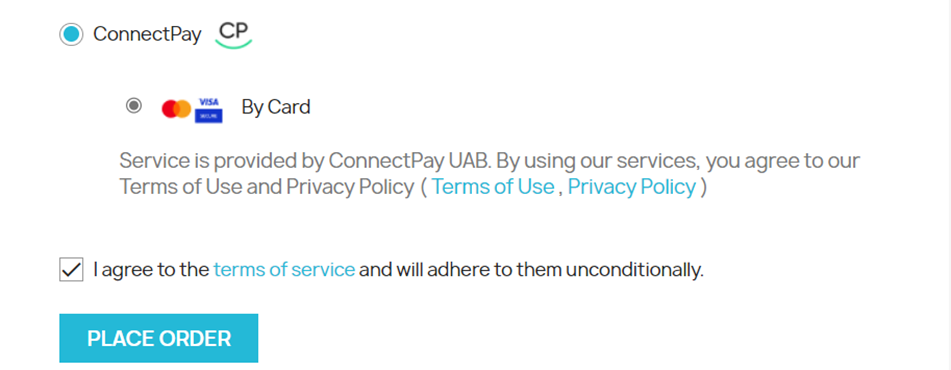
Image 10.6
Currencies
Currently, ConnectPay supports only EUR currency for bank transfers and EUR, GBP, SEK, NOK, DKK, PLN, USD for card payments (while settling is done in EUR currency).
Support
If you have any questions on how to configure this module, please contact us at [email protected] If you wish to get a proposal for a contract, please contact [email protected]