You can find our extension here:
Installation guide
To install ConnectPay plugin, you need to visit Plugins -> Add New page inside your WordPress admin area and then select Upload Plugin. Upload a file downloaded from us and install it.
WordPress will now download and install the plugin for you. After that, you‘ll be able to immediately activate the plugin by pressing the „Activate“ plugin

How to find a module in your e-commerce?
For the main ConnectPay plugin configuration page, you need to visit WooCommerce -> Settings -> Payments, and there you will see (if the ConnectPay plugin is activated) the ConnectPay payment method in payment methods list (Image 3.1).
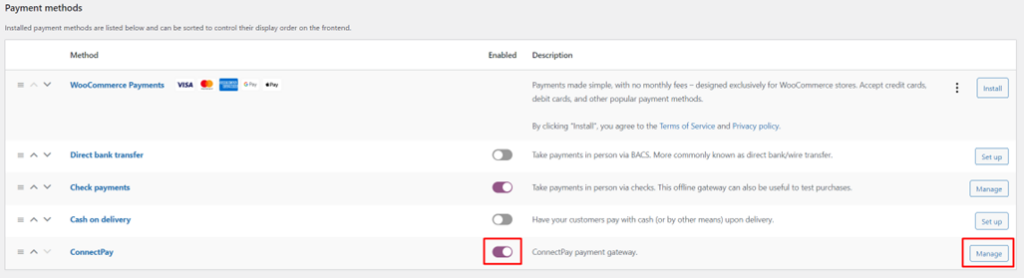
You can enable it on this page or on the plugin’s configuration page. To configure the ConnectPay payment gateway, click the “Manage” button next to it or click on payment method’s name.
How to configure your module?
Once you’ve opened our module, please enter your credentials, and configure basic features.
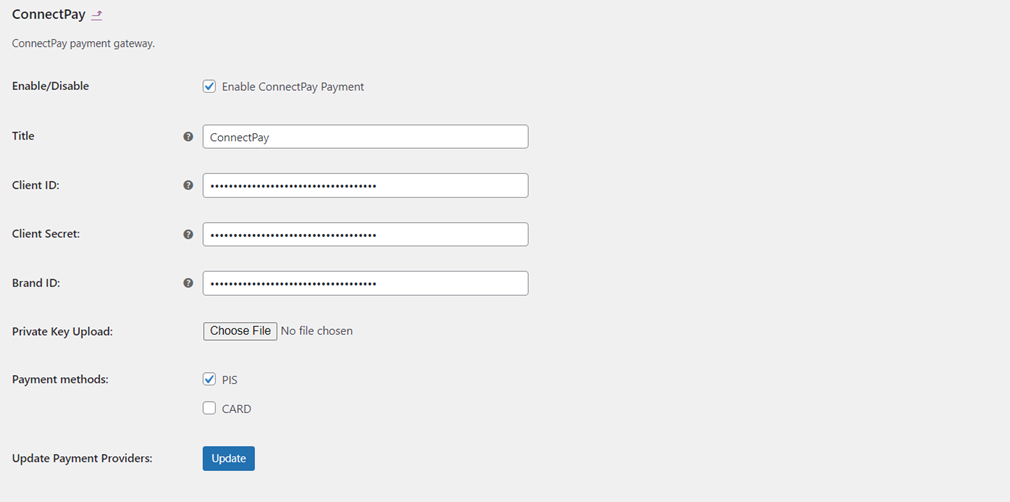
- Enable our module to use it in your e-shop.
- Title – you can change our payment title if you wish or leave it by default “ConnectPay”.
- Client ID is provided to you after you sign a contract with us.
- Client secret is provided to you after you sign a contract with us.
- Private key is provided to you after you sign a contract with us, please don’t change the format and upload exactly as you got it from us.
- BrandID is provided to you after you sign a contract with us.
- Payment methods – payment methods for the customers to pay within the E-Shop. PIS is the payment initiation service, which allows to pay via payment provider (bank); CARD – payment method by debit/credit card (MasterCard or Visa). If you have a contract only for payment initiation service, before enabling Cards, please contact your account executive for your contract change.
- Update Payment Providers – button for getting/updating payment providers (based on selected country on Payment countries field). It will only work with correct authentication credentials.
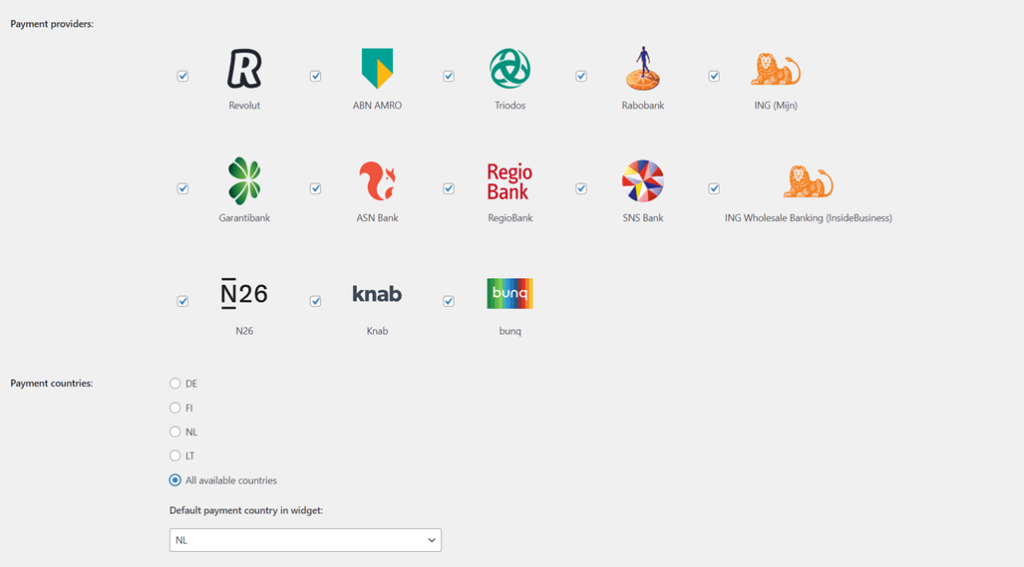
- Payment providers – payment providers list (based on a select country from the Payment countries field) with the function to enable/disable payment providers for the E-Shop. It is an optional configuration. If you don’t choose any, your customer is redirected to our widget and selects providers there. If you choose some options, then the provider list and logos are represented in your E-Shop, and your customer selects providers in your environment. At this moment, provider selection is not possible for Germany.
- Payment countries – it can be the main country that is used first, from which providers (banks) are used to accept payments. You can use multiple countries, but one must be selected by default (it represents the first value in our widget / your E-Shop your customers will see). Options list:
- DE – GermanyFI – FinlandNL – NetherlandsLT – Lithuania
- All available countries
- Default payment country in widget (only visible when “All available countries” is selected) – payment country which customer will immediately see when prompted to ConnectPay’s area via “By bank transfer” payment method.
Notices and requirements:
- At least one payment method should be selected. Select a method that is mentioned in your contract.
- If the PIS payment method is selected, then at least one payment provider should be selected.
- If you work in multiple countries, after changing payment country, make sure to save the form and then update payment providers via the “Update” button.
- When “DE” or “All available countries” is selected, instead of payment providers list in the checkout, customer will see payment option – “By bank transfer”, which will allow to freely choose any payment provider.
- When “DE” is selected, after selecting “By bank transfer”, customers will be redirected to ConnectPay’s area, and there they will be able to search through Germany’s payment providers and pay via their selected bank.
- If you work in multiple countries, when “All available countries” is selected, you will need to choose payment country, which the customer will see by default when selecting the “By bank transfer” payment method.
- When something is incorrect, you will see an error message at the top of the form.

Order states
ConnectPay controls 3 different WooCommerce order statuses:
- When payment is successful, then the order in your e-shop is changed to “Processing”.
- When payment is unsuccessful (failed or abandoned), then order in your e-shop is changed to “Failed”.
- When payment is not in final state (e. g. waiting for bank’s approval), then order in your e-shop is changes to “Pending Payment”.
Status checker events
When the order is placed via ConnectPay payment method, two status checker events will be scheduled:
- The first one will check the payment status after 4 hours (non-repeatable). It will cancel the second event scheduler if the payment is terminal (payment status is final)
- The second one will check payment status after 5 hours and then every hour until it’s canceled (repeatable every hour)
To monitor ConnectPay status checker events, you will need to have “Crontrol” plugin installed. For that, you can checkout THIS guide. After installing “Crontrol” and activating plugin, you will be able to check ConnectPay status checker events.
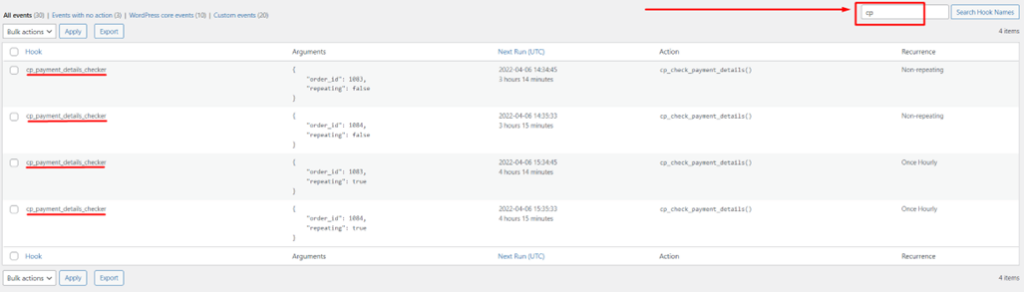
To check ConnectPay status checker events, you need to visit the Tools -> Cron Events page. There, insert the keyword “cp” in the search box to filter out ConnectPay events. Then, you should be able to see events with the name – cp_payment_details_checker for each order placed via the ConnectPay payment method.
Example:
Possible errors
Possible errors list:
- Checkout:
- “Error processing checkout. Please try again.” (Check logs for specific error – section 8)
- Cart (after unsuccessful payment):
- “No such order”
- Error from ConnectPay’s (for more details contact ConnectPay)
- “Payment failed” – when payment unsuccessful
- Admin panel:
- “Wrong private key extension” – wrong private key file extension (correct formats: *.p8, *.key, *.p10, *.csr, *.cr1, *.pem, *.crt, *.p7b, *.spc, *.p7r, *.p7s, *.der, *.cer, *.pfx, *.p12)
- Error updating payment providers (for unknown errors, contact ConnectPay):
- Example: “Error updating payment providers: 401 Unauthorized“– invalid authentication credentials (Client ID, Client Secret or Private Key)
Logging
If you get an unexpected error, you can check the error in more detail in WooCommerce logs. For that, you need to visit WooCommerce -> Status -> Logs, choose logs of desired date and then press “View” to view specific logs.


Important notes
IMPORTANT: WooCommerce, by default, has a configured event (event scheduler) – woocommerce_cancel_unpaid_orders, which cancels (Pending payment -> Cancelled) unpaid orders after X minutes (60 minutes by default). If you wish to disable this option or change the time it takes to check for unpaid orders, make sure to change the Hold Stock (minutes) option in WooCommerce -> Settings -> Products -> Inventory. You can read more about how to configure this option – HERE.
E-Shop side
Description for E-Shop checkout side.
A Checkout page with the selected ConnectPay payment method will look something like this:
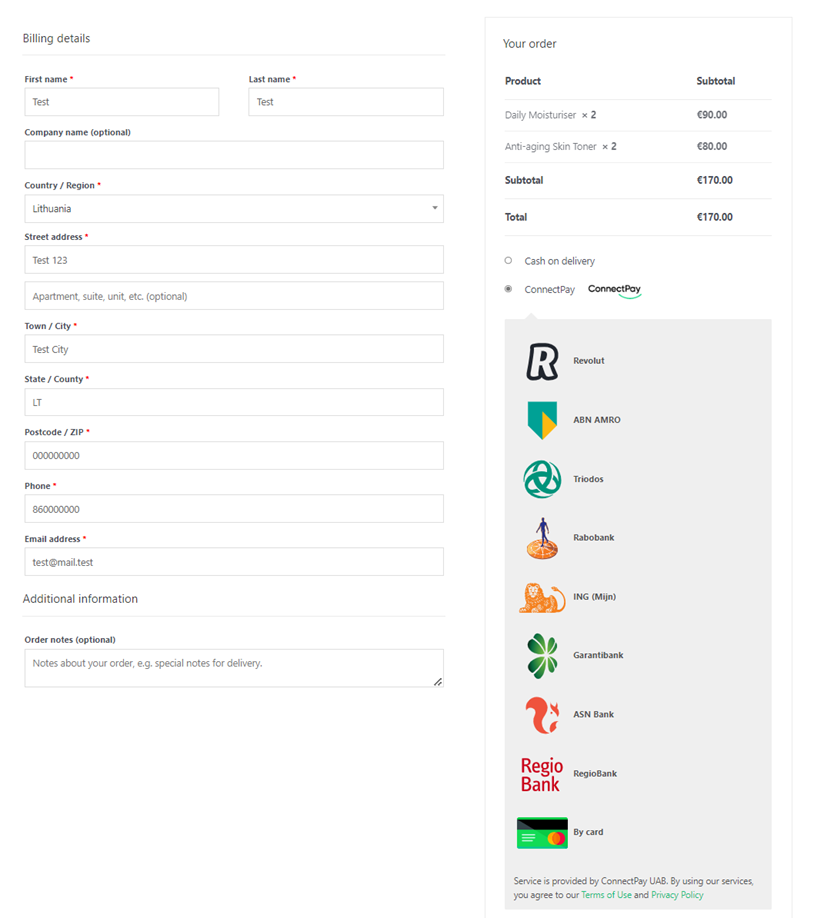
All payment providers selected in the plugin configuration page, will be shown here, at the checkout page for customers to choose. Options will differ, based on selected payment methods and payment countries.
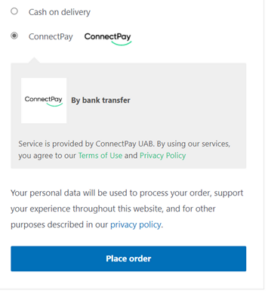
DE or All available countries selected as payment country, PIS payment method selected:
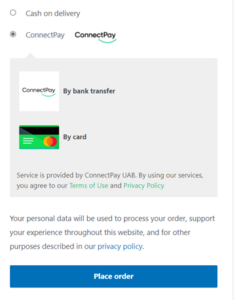
DE or All available countries selected as payment country, PIS and CARD payment methods selected:
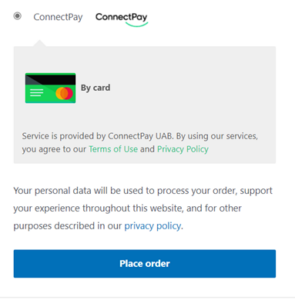
Only CARD payment method selected:
Currencies
Currently, ConnectPay supports only EUR currency for the Accept Payments service.
Non-prod plugin
Support
If you have any questions how to configure this module, please contact us at [email protected] If you wish to get a proposal for a contract, please contact [email protected]